Via dropbox, here are the links to the exported apps.
Windows App
OSX App
Just run the .exe for Windows, and you OSX people...do whatever it is you do.
Have fun!
Tuesday, 21 June 2011
A Beginner's Guide to Firearms Design
About
Arma Certatio, or Arms Race, is about a designer's dichotomy. The act of creation is fulfilling, but ethical dilemmas arise surrounding the effect your creations have on the world. The case of an arms dealer or manufacturer is a stark one which raises the point conveniently strongly, but the same could be said of working in the advertising industry or on a film which reinforces negative female stereotypes.
In the comfy and context-free workspace, things are bright and cheery and responsive. We don't worry about what happens once the weapon sells. But the battle results screen tells a darker tale both in palette and meaning, where both sides have really lost despite the numbers.
Motivations
I have a long-held fascination for firearms, and, as a deeply self-analytical person, an equal fascination for the dichotomy it presents me with. My beliefs are probably closest to what you would call Buddhism, and I certainly don't see firearms as a force of good in the world. But as objects of power, mechanisms that have been refined through the most powerful of selection processes - life or death to their users - they are still fascinating. Their impact on the shaping of the world is undeniable. This both troubles and tickles me, that I am such a contradiction.
I also really wanted to make steps toward the sort of things I want to spend the next years of my life making - computer games for intelligent people. Games that are creative not only in their implementation but in the very act of playing them. Games that create spaces where creation is swift and gratifying yet deep enough for fulfilling creative expression. While the Creation canvas is tuned to build guns currently, I see many wider applications for making other objects (wearbles, vehicles, general machinery) and then deploying them in a game environment to test and play.
Instructions
Arma Certatio was a tricky beast in some respects, so there are many types of useful player feedback that simply aren't present yet. Some of this information is present in the debug console output, but there are a few key things that are not easy to grasp.
The key idea of the game is actually to help both sides in an escalating war. In the beginning, side A (who is represented on the left in the battle screen) has asked you to build them a weapon to defeat side B. Side B starts with a default weapon that is supposed to be fairly poor, but the simulation is iffy so for some reason a rather decent weapon is required to beat them. Luckily, my semi-automatic pistol did the job in the presentation. Forever after, whichever side loses the battle will be the side you are supplying the next weapon to, and this is alluded to in the console when a battle takes place (you are informed if you helped the winning side).
Building a good weapon
When a gun is evaluated, it will tell you its stats in the console window. Weight is the number of blocks present in the weapon (stray unconnected Power Switches can mess this up), and affects a soldiers chance to dodge when fired upon. Damage is the number of bullets fired during one Fire Sequence, and is the damage done to an enemy soldier if the shot hits. Fire-rate is the number of actions in the Fire Sequence, and determines how long a soldier must wait between attempting shots (representing the complexity of the mechanism). Accuracy is made up of two parts, barrel length and barrel slack. The last bullet to fire in the fire sequence is the one that counts for these, and it will scan the barrel as it goes, noting if there is any space between it and the barrel, and how long the barrel is. Barrel length counts towards accuracy, and barrel slack against it. Accuracy in the simulation is the probability that the gun will hit when fired.
The UI

Tools Palette - This is up the top. Clicking a tool will highlight it and all blocks drawn will now be of that type, or if you select the eraser (left-most) you will delete blocks. The tools are: eraser, metal, moveable, piston base, piston arm, slider base, slider arm, power line, power source, switch, bullet.
Canvas - In the middle there. Left clicking will draw with the selected tool (or erase) and right-clicking will interact with the blocks. In general, you must first right-click a drawing to turn it into a working mechanism. Then, if the mechanism is allowed to move, you can drag it around with the right mouse button.
Switch Tester - Bottom left. Clicking 'A' will trigger all switches tuned to 'A'.
Fire Sequencer - Used to create a sequence of switch activations. Left or right click to tune the blocks, press FIRE to test the sequence.
Sell Weapon - Finalises the design and starts the battle simulation. What your gun is capable of each time it is 'fired' is determined by the Fire Sequence you have set.
Mechanisms

From left to right:
Pistons - Made up of piston base and piston arm blocks. Draw the fully extended piston first, then right-click the base to create it. Right-clicking the different base blocks will change the extension of the piston arm accordingly. Piston arms can be any shape, but piston bases are only evaluated as a line.
Sliders - Similar to pistons, but the arm connects at the side of the base.
Power Sources - Required for switches to operate. Right-click to create (must be made up of 4 or more blocks).
Power Line - Helps to connect switches to power sources.
Switches - Effectively, a switch triggers all adjacent blocks (not diagonal) when it is triggered. Switches listen on a channel, from A to G. Right click to change the channel. When that channel is triggered (normally by the Fire Sequencer) all switches listening on that channel will be triggered in the order they were created. Switches must be connected to a valid power source, directly or via power lines, in order to work. Switches are normally used to trigger pistons or sliders to move to a certain spot, or bullets to fire.
Bullets - Bullets must be made of two blocks. Right click to activate (create). Bullets can be RMB dragged around. When a bullet is triggered by a switch, it will fire. The block triggered 'explodes', and the other block becomes the projectile, which flies in the appropriate direction.
There are more than a few secrets and loopholes (bugs are features!) that I will leave to you to find.
Friday, 3 June 2011
A (Potentially) Good Book
http://www.amazon.com/Texturing-Modeling-Third-Procedural-Approach/dp/1558608486?ie=UTF8&tag=procedu-20&link_code=btl&camp=213689&creative=392969
According to this blog (also an interesting read if you like procedural content), this book on procedural texturing and modelling techniques is peerless in its field. Ken Perlin and Steve Worley both wrote chapters in it, to give you an idea of the pedigree. I almost expected to find a chapter by JP.
:P
Buying instructional books for digital disciplines always feels inefficient to me, given the rate of change, but I think this sort of thing can be the exception given the solid theoretical underpinnings which can end up being used and tweaked for years.
Tuesday, 31 May 2011
Parallel Universes
Idea number three.
You have a basic avatar, and a room with several objects in it. One of them is a Universe Traversal Chamber. Entering the Chamber will transport you to a random parallel universe, where things change. Colours, shapes positions etc of objects will change, as well as the laws of physics (gravity most notably).
For this to be entertaining, there should be a wide variety of ways in which the environment can procedurally change.

Images and their Secrets
This is idea number two. The core idea involves reading in an image (possibly room for Google Images API) and then generating a few 'species' on the image which will feed off it's colour information. The image will lose saturation as it is eaten, and the species will evolve/adapt various traits based on the colours they have been devouring. When coming into contact with each other, they will fight, and the outcome of battle will be determined by their traits.
It suggests that images have a secret hidden world of activity going on behind the scenes.

It suggests that images have a secret hidden world of activity going on behind the scenes.

Arms Race sketch
This just illustrates the basic loop of:

- Losing side asks for help
- Design them a weapon
- Watch battle simulation
- Get money if they win
- Losing side asks for help

Pixel Guns
An idea of the presentation of the guns for Arms Race. Each pixel means something, like black for metal exterior, blue for power, greys for pistons/moving parts, orange for explosive charge, brown for projectile, etc. This is how the device is designed simultaneously in form and function.

Thursday, 26 May 2011
Light Reading
I have some other ideas in the works, but they are all spin-offs of my original concept at this point. Here is some light reading I am going through for inspiration and general interest.
- http://en.wikipedia.org/wiki/Arms_race
- http://en.wikipedia.org/wiki/Evolutionary_arms_race
- http://en.wikipedia.org/wiki/Red_Queen%27s_Hypothesis
- http://en.wikipedia.org/wiki/Firearm_actions
- http://www.howstuffworks.com/machine-gun.htm
The idea of an evolutionary arms race particularly caught my eye, this would be a great spin-off point resulting in a fairly different outcome.
Tuesday, 24 May 2011
Project 4: Arms Race
I've been kicking around the idea of a 2D game in which the player can design their own weapons. Through placing blocks of various materials in various configurations, the player effectively draws their 2D lo-fi gun while also defining its function. This is part of a wider series of experimental construction-based gameplay ideas I am getting increasingly excited about and would much rather work on.
So why not start investigating a portion of this within the framework of this course?
An interesting concept built itself in my head as I rode the train, about a scenario in which the player is an arms dealer. An evil arms dealer, profiting from a war between two sides, both of which are customers. One side will ask for a great weapon to slay their enemies with, and the player can design them a weapon. Then a simple simulation is displayed showing the two sides fighting, one using your weapon. The losing side will then come to you requesting a weapon that will defeat their enemies. This cycle repeats ad infinitum.
Just to highlight the ethical questionability, the player will earn cash each time their weapon brings victory.
There are quite a few things to consider to make this feasible in the timeframe:
- lo-fi graphics for everything
- bare minimum animation
- simple AI and setup for the war simulation
- simplify available pieces and functions for gun construction, while allowing for a reasonable amount of creativity in form and function
- physics for bullets should be very simple
This is idea 1 anyway.
Tuesday, 17 May 2011
Dress-ups
Two aesthetic modes I have settled on (in lieu of a lovely outline mode) are Industrial Iron and Modern Gloss.


These show that the language of machines has not changed as much as we might think since the industrial age, they are still parts within parts.
This will be my final result unless I can manage to get something like Gouraud shading implemented before hand-in. So happy with the results!
Parts are made of parts
The recursion is working! Boy did that take some time.
The hardest thing was getting the model to transform so that the selected object occupies the exact same space as it's container once did. This is necessary to facilitate the hand-over from mini-machina to master-machina, where all the transforms are reset but the machina is now drawn relative to the world rather than its master. I knew the transforms necessary to get the mini in it's place, so I thought I could just apply the reverse transformations to the master object and hey presto. But no. After much hair pulling, it turns out that the solution requires applying the reverse transformations in a different order. Some IF statements sorted that out.
Lerp() came to my aid in getting the transforms to ease out, which has a cool effect. It doesn't finish perfectly, but certainly does the job.
The transparency really completes the effect, fading out all the other pieces till there is only the new machina.
In my original design, the user would click on an mini-machina to travel to it and look inside it. Picking in 3D space seems doable, from the example I found here, but I decided to cut the feature due to time constraint. It isn't crucial to my project really, so it's just a 'nice to have', even though I was interested to try it. Instead, the mini-machina is picked randomly when you middle-click, and it only triggers if the object is exploded far enough (trying to minimise clipping and confusion).


A controlled explosion is a good explosion
Finally got around to sorting the explosion of parts along more axes than just X. Taking some angles of parts from Blender helped again, but I needed to sort out some vectors. In hindsight 3D vectors were what I needed, but since I had consciously made the parts on only two planes (xy and zy) I didn't really have to solve this, just do 2D vectors and swap the planes around when needed.


Luckily I had a handy vector function from my previous assignment that takes a point, angle and magnitude and gives you back the new point (this is super handy, why do PVectors not do this?). I think I'll write a version that can handle 3D also, then put it into a nifty Utils class or module that I can import into later projects.
The motion is not properly hierarchical, because the class structure stupidly is not either (man my class structure is overly simple) but I managed to cheat a bit for that too, since only a few parts really needed to act relatively.
Oh, and the direction-based mouse code I have been proud of and using for a while now has been superceded! Turns out the normalisation of the direction information (so that it's either 1 or -1 regardless of how far you actually travelled) was a dumb thing to do. Because of frame rate, the mouse moves further than 1 pixel per frame, so the values you are modifying (like rotation of the model) because proportional to the time spent moving the mouse, rather than how far you moved it. The end result is control that feels muddy and sluggish, since moving the mouse the same distance will not always yield the same outcome. I had written a bunch more code and introduced several global variables to get around this normalisation for my current project before I realised that simply taking it out fixes everything. Facepalm.
Offspring
I have added the ability for the model to generate smaller versions of itself inside its shell, at the predetermined points. My Blender model actually has all these mini versions in place, and I adapted the mini version object's position/rotation/scale data directly from Blender and it worked like a charm.


The interior parts are chosen at random, as are some other parts, to provide some variety between versions. Mostly it is swapping out a 'filled' spot (something installed) for a 'plugged' spot (something could go here but isn't installed, so there is a space filler) or simply an empty space.
The way I avoid infinite recursion while building these things is to only fill the interior with mini parts when the object is first exploded, which can only happen to the 'master' or top level object. There is a bit of trickery with the front slots, as they are visible even without exploding, so I have dummy objects in there that are replaced seamlessly (*ahem*) with actual mini parts when the object is exploded.
Mouse controls for rotating the model along two axes are now in, along with explode control. RMB and LMB drag respectively. Right now it works based on proximity of the mouse from the screen's centre, but this doesn't create intuitive behaviour since clicking and dragging in a new place causes the mode to snap to the appropriate orientation suddenly. It also requires much more precise mouse positioning. I want to improve it to a method I have used in the past, where the difference between mouseX and previousMouseX is used to determine mouse drag direction, and that is in turn used to modify the value. This means the position of the mouse is irrelevant, just the direction of its movement is important.
An NPR in the hand is worth two in the bush
This Non-Photo-realistic Renderer for Processing was developed as part of a Master's thesis by Katrin Lang. The results look spiffy! GLSL seems the way forward, but there simply is no time to learn it, at least for this project.

The two example programs given with the library are not encouraging. One does sort-of work but is really complex and has terrible performance (probably a high-poly mesh though), and the simpler one doesn't display properly. Even less encouraging is this line, next to the most recent available download:
 I've looked at his methods and could probably implement a Processing version of the wireframe contours method given enough time (and using the OBJLoader's interface to the model data). But alas. No time.

The two example programs given with the library are not encouraging. One does sort-of work but is really complex and has terrible performance (probably a high-poly mesh though), and the simpler one doesn't display properly. Even less encouraging is this line, next to the most recent available download:
May 30, 2009 | Fixed some issues that caused the library to use a ridiculous amount of RAM. Unfortunately, I seem to have introduced another bug that causes the library not to work on Windows.Hmmm.

Final model done
The final model pieces are done and I have them imported and exploding (on the x-axis only for a quick test). Looks super awesome! Not really close to the outline/blueprints aesthetic I really want, but still awesome to see it working.


OBJLoader working
I got hold of the OBJLoader library by Saito, Matt Ditton and Ekene Ijeoma and got it working!
Preliminary tests were positive, but I did pull my hair out over OBJ export settings for a while once I turned off the stroke and noticed that the triangles up top were messing up. Turns out that the best way to ensure compatibility is to triangulate your model at export, and also tell OBJLoader to read the model as triangles instead of quads or polygons. Which makes sense, really.
Using libraries with processing.py isn't too bad, the import syntax is just a little weirder (somehow there is no 'import something.thing.*') and you need to find the processing.py/libraries folder to chuck it in. Not sure where this folder is on the school Macs though, I did look once and got lost. Never fear, home PC to the rescue.

Note the gap up top where triangles should be...
Sketches
I have decided to go with the 3D option, but use Blender to pre-model pieces and intelligently arrange them in Processing. 3D geometry generation is a major thing to get to grips with, and there are many things even beyond basic meshes that I very much want to do, like bolts! How would you drill a nice hole in a mesh for a bolt? Doing my own boolean mesh operations seems a little outside scope. So, pre-modelled geometry it is. I remember something about OBJ importing support in Processing, so I must test that soon.
Here are my sketches so far.


Here are my sketches so far.


Project 3 - The Beginning
Late into the project as it may be, I recently remembered a random idea I had a year or so ago that would be perfect for this project: procedurally generated machines. The scope of such an idea is pretty large, so here is how I narrowed it down to use the ideas of hierarchy:

- A 2D mechanical machine, made up of procedurally assembled moving parts like pistons and wheels. Clicking on a region would zoom in, and when a part became large enough it would be replaced by a collection of smaller parts that did the same job.
Advantages with this one include dynamic motion possibilities, 2D is fairly simple and everything can be made from scratch in Processing. Disadvantages are potentially flat composition colour-wise, difficulty of resolving motion, difficulty of preventing parts overlap and difficulty of zooming in/replacing/culling unnecessary parts.
- A 3D machine that does not move, but instead expands into an exploded view to reveal all its parts. Clicking on a part will zoom in on that part and erase the others, then that part can be exploded, and so on. Ideally 3D forms will be generated in Processing to suit.
Advantages include no need to solve motion issues, impressive interactivity available with 3D, awesomeness of exploded views. Disadvantages include severe difficulty in generating 3D geometry for the purposes I want.
I will need to investigate further to see if I can come up with any theoretical methods for approaching these problems, starting with sketching. I also need to explore the exact aesthetics qualities I am looking for.
My inspirations for machine aesthetics (and my love for exploded views) come most recently from the game Portal 2 and also from the Iron Man credits.

Portal 2
Iron Man credits
I would love to do some sort of edge detection shading just to cap off the blueprints feels. From studying the Iron Man credits further though, this is not a trivial thing to get right. They seem to be drawing edges where only one face is visible, rather than just getting an overall outline, so a simpler hack where a flat coloured version of a shape is drawn a bit larger and behind the real shape won't achieve this level of detail. I may have to look into GLSL or something...
Wednesday, 4 May 2011
HexDraw
Messing with making a little drawing app that lets you draw with hexagons.
Why is it so fun to make things that have no chance of becoming my final project? Never mind, I forgive myself since making awesome stuff is pretty much the meaning of life.

Why is it so fun to make things that have no chance of becoming my final project? Never mind, I forgive myself since making awesome stuff is pretty much the meaning of life.

Saturday, 23 April 2011
Simplex Noise
Apparently, Ken Perlin fixed a bunch of things that were a bit off about Perlin noise in 2001, while also reducing how expensive the function is to compute. The result is named simplex noise.
Here is a neat paper on the subject.
Here is a guy using it in Java, to do procedural content for a simple game. Lots of other cool little projects on this site too, especially web synths.
Here is a neat paper on the subject.
Here is a guy using it in Java, to do procedural content for a simple game. Lots of other cool little projects on this site too, especially web synths.
Tuesday, 12 April 2011
Final - Luke changes his mind
So I was looking at my terrain/island generator, thinking about what Elle and Richard said about it being a bit too literal and a bit too "floaty islands in Avatar", and reached a point where I didn't think I could take it further. It is too rigid, although I am fond of it and will use the concepts I learned for other applications.
Further back in my blog history, before I handed in project 1, I was exploring another sort of random walk with strings of polygons in 3D space. I revisited this and managed to find some remarkably organic motion when animating a single polygon string, smoothly changing the angles between each polygon. After a chat with Elle, she suggested I see where I can take this before hand in and if I can improve its aesthetics.
This still fits into my core idea of using random walks to build complexity, ultimately ending up with something we read as organic rather than inorganic and computerised. The islands code generated forms that read like organic terrain, but they had no element of motion. The polygon stream code is a little less organic in form, in some cases, but it's motion is variable and unpredictable in a very eye catching and natural way.
The alpha is tuned to highlight the interactions between polygons, rather than the polygons themselves, in order to further remove the resulting image from its beginnings.
To talk directly about the brief, the randomness in this project is in the net construction. It chooses a side of the polygon, and an angle to fold by, then attaches another polygon to that side with that angle of rotation, and repeats. When these fold angles are incremented over time in the animation, the motion that emerges is a function of the initially random selected angles and directions.
The control I exhibit is in the number of sides of each polygon, the range of angles available to select, the colour ranges, speed of motion, in other words general aesthetic direction. I have constrained the resulting strings (and actually placed 4 of them in the scene) in every other way to achieve interesting motion, and to show as much as possible to the viewer of what is unfolding. Crucially, the motion is smooth because the folding angles are not chosen randomly at each step, they are instead chosen randomly once and then a random seed is used to recreate them identically (but incremented slightly, to animate) each frame. Were the motion not smooth, the organic properties of the whole piece would be destroyed, so controlling this aspect of randomness was incredibly important to my project.


Monday, 4 April 2011
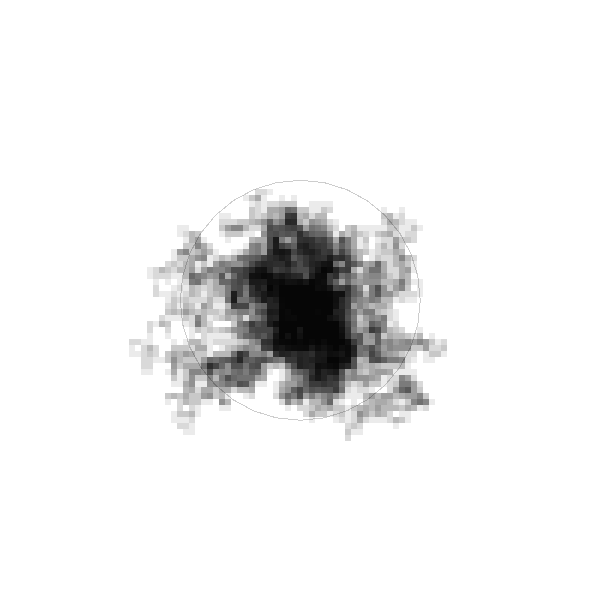
Islands
I am really interested in generative landscapes (and creatures, but creatures are much harder) so I have been messing about with using a controlled random walk to build me islands. I plan to compose these nicely as a scene for Project 2, plus some other factor that is more surprising and unexpected (yet to be decided).


It makes maps! The circle is to test the radius which I think I am restraining it too. It is fairly elastic though, so this isn't really a big help.

Letting it off the leash. Also with a small step size. Looks smokey!

Shows the distribution well. Random walk has an advantage over random points, for landmasses, because everything is by default connected. Using some alpha to show how often it retraces it's steps shows up well how much foot traffic ends up in the centre.

3D! Heightmaps! I had to store all the visited points in a dictionary to do it, so I could index them by their location, and then store the 'frequency of visits' next to each point so I could measure how 'dark' each square is. The random walk might be 5000 steps, but the dictionary only has a few hundred entries, since it goes over old terrain often. I can use this 'darkness' information to determine the height of each location.

Colours! Mapping the frequency to saturation is nice too.

Adding in some directional lighting and letting the walk breathe a bit, I get some nice harbour cities.

Changing a few things and scaling up, we get some very nice landscape happening. Perhaps a few too many holes to be realistic, but still interesting.

Hue! This is about the point where I add all kinds of fun mouse and keyboard controls! There are tons in this one, perhaps I should post the code just so people can play with it.


Reducing the size of the elements (without reducing the space between them) creates some nice effects.
Exercises in Random Shaping
The exercises I have been playing with are mostly to do with random walk, and filtering the randomness or controlling the density.


This program picks one of 8 possible directions to walk in, each frame, but the distribution is made 'more gaussian' (not sure of terminology) so that the density is clustered around one particular direction. This averages out the path to be in one direction overall, even though it makes many deviations.
This is another random walk, moving in one of 4 directions and then drawing a square. The walk is influenced though, so I think this defines it as a filtered randomness. A central point is defined, and the distance to that point is checked at each step. Through mathematical wizardry, I convert this information into an influence value, so the decision it makes to walk in one direction or another is slightly influenced by its proximity to this point. This effectively reins it in, and can create pretty cool landscapes (more on this later, it is the basis for my Project 2).

This one uses the technique of averaging the neighbouring points in a point array to draw successively less distorted circles. I managed to find out how to control how much it averages the points when passing through the filter (rather than just making the current point equal to the average of it's neighbours).

This is just visualising density, in the y axis. This uses the method of summing random numbers. I hooked up some controls so its possible to play around with which axes are being density controlled, how aggressively gaussian the distribution is, and how big the particles are.
Tuesday, 22 March 2011
Project 1 Final - MicroBreath
I have decided to go with the micro-organism looking thing from my pre-3D code, with a few modifications. I really like where the 3D stuff is going but I feel like it is more suited to project 2, and could be really interesting when further developed.
I call this project MicroBreath, because it is based on the idea of a micro-organism breathing, and what we are looking at is its bizarre alien cells expanding and contracting.
There are many interactive controls to change the pattern, but the default pattern is the designed one. There are mouse controls and keyboard switches, all commented in the code.

Thursday, 17 March 2011
Generative/Addictive Photography
I find this compelling for much the same reason I find exploring and photographing Minecraft worlds compelling; no one has seen what you are seeing, nor will they. Like the sand mandalas made to demonstrate the Buddhist ideas of impermanence, it wafts into being, and wafts away again just as easily. It has not been before, nor will it be again.
MUST. STOP. TAKING. SCREENSHOTS. AND. GO. TO. BED.


MUST. STOP. TAKING. SCREENSHOTS. AND. GO. TO. BED.


Subscribe to:
Comments (Atom)